 Sound Insulation
  Soundproofing
  Vibration Isolation
  Silent Ventilation
  Accessories
  Thermal & Acoustic Insulation
 How to build and soundproof a studio, hifi room or sound booth
The tips and principles on this can be applied in soundproofing and building a studio, home cinema or any music room with louder sound and music than usual. We refer to these spaces as 'studio' for here on out. A 'studio' is a must-have for musicians, but also for vloggers, DJs and producers. A studio, or studio booth, makes it possible to work undisturbed and without causing nuisance. Studios are not only spaces intended to keep sound inside or outside, but also a space in which the acoustics are tuned in such a way that sounds, music, and voice sound exactly as desired, with or without reverberation.
There are all kinds of studio cabins on the market, such as the Studiobricks. These complete studios have advantages over self-built studios, but they are expensive and do not always fit everyone's budget. That is why Acousticshop.co.uk likes to give tips on how to make a sound studio yourself.
In principle, you can determine the design of a sound studio yourself as long as the acoustic measures described here are applied correctly. When it comes to the design, take the dimensions of the studio into consideration, so that the materials can be used efficiently.

If you are familiar with 3D-drawing software, you can refine your design in more detail than on paper. Consider, for example, a design that is movable, just like the Studiobricks system. By designing a studio that consists of multiple segments, you can simply disassemble your studio in case you are moving and you want to take it with you.
The simplest design is a studio cabin, or studio box, consisting of five wooden frames. Four frames make up the walls and the fifth forms the 'roof' of the studio. If the studio fills the space in which it will be built, make sure there is enough free space between the ceiling of your room and the roof of the studio. For practical reasons, you can make a roof that consists of at least two parts. When the roof consists of several parts, it is easier to place the roof on top of the walls.
Making soundproof studio walls
In order to make the studio walls, create sturdy frames from beams with the desired dimensions for the height, depth and width of the studio. Make the frames at least 40 mm deep, this is also the thickness of the cavity filling (Acoustic Cotton Wool). The sides of the frames that make up the outside of the studio should be equipped with at least 1 layer of sheet material, plaster or wood board. The type of sheet material you choose does not matter much, but the heavier the walls become, the higher the insulation value. The frame is now closed on one side and can now be called a wall. The walls should be equipped with Polypress Strips at the bottom, which will rest on the floor, so that the walls are immediately disconnected from the floor. Put the three walls upright and mount them together. The studio is already taking shape!
Now that the walls are standing, the space between the beams of the frame is filled with Acoustic Cotton Wool cavity filling. Now the walls can be closed with plaster or wood board. For the inside of the studio, we recommend a so-called sandwich construction. This means a double layer of the same sheet material with Isomat KE 14 applied in between. A bonding of these layers is preferred. You make the roof in the same way as the walls and place it when the last wall is mounted.
Soundproofing with Isomat KE
Layers of the same sheet material have an equal individual frequency, which negatively affects the insulation value of the walls. The layer of Isomat KE provides a lot of (extra) mass, which will interrupt the natural frequency of the other materials, so to speak. The result is a much higher insulation value of the studio. 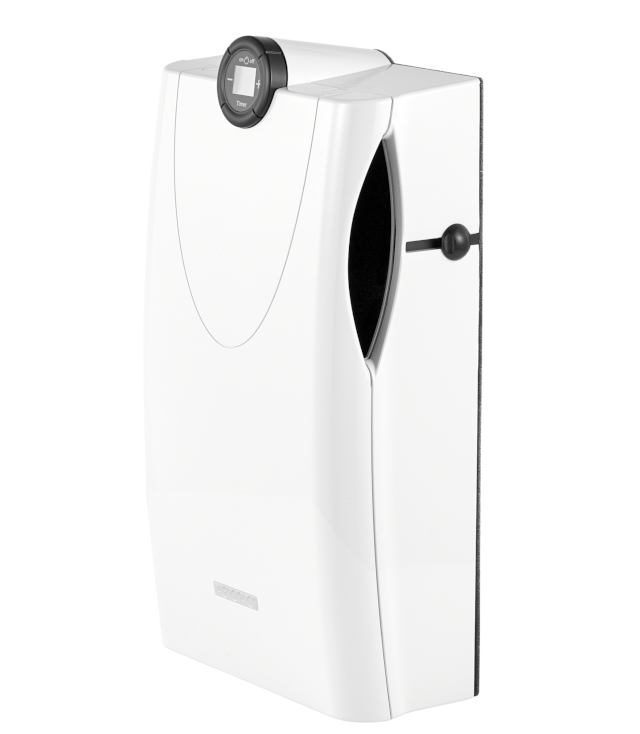
Making the last wall
This will be the 'facility studio wall' which closes the studio. In this wall you can add facilities such as a light button, socket, power and cable passage, ventilation unit and the studio door. The wall is made in the same way as the three others, but with the exception that the cavity of this wall is about 180 mm deep instead of 60 mm. In the cavity you glue Acoustic Cotton Wool against the outer and inner plate. This leaves a hollow space of 60 mm. Then two holes with a diameter of 80 mm are sawn in the wall and the wool material. One hole at about 300 mm measuring from the bottom of the wall (this is 30 cm above the studio floor). The Aeropac ventilation unit is mounted using this hole. The second hole should be located at about 250 mm measuring from the top of the wall (so 250 mm below the ceiling). This extra-deep wall now functions as ventilator.
The Aeropac sucks in outside air through the hole at the top of the wall, through the hollow wall, and subsequently blows it into the studio through the unit at the bottom of the wall. The supplied air has now travelled the longest way possible along the insulation material inside the cavity where most of the noise remains while the air has a free passage. For the removal of air, you apply the same hole principle elsewhere in the same wall, but this time without the Aeropac. Due to over pressure, the air is automatically 'pushed' out of the studio. Also mount wall grids on top of these holes for a beautiful finish. In this same wall you make the cable passage as well. The Roxtec Comseal can be used for the passage of data, power and audio cables.
Soundproofing a studio door
Studio doors should be heavy and close air tight, make the wall for the door extra sturdy! We have a tips page on how to soundproof doors, "Step-by-step plan on door insulation".
Floating soundproof studio floor
Now that the walls and ceiling are ready, the floating floor can be installed. First apply the studio walls with Polypress Strips as you would apply skirting boards. Next you can use a double layer of reinforced plasterboard on top of a layer Polypress vibration insulation sheets. It is important that the plasterboard panels do not touch the walls anywhere!
Learn more about soundproofing and acoustics
- Studio acoustics
How to improve studio acoustics. - How to make a sound maze
Silent ventilation with a sound maze. - Soundproofing walls & ceiling
Acoustic studs to soundproof a studio
Questions? 
Do you have any questions about this topic? Please feel free to contact us, we will be happy to answer your questions as soon as possible.